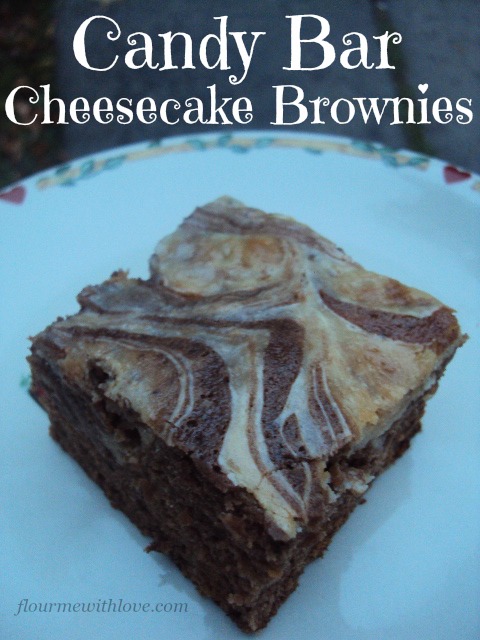
The Ultimate Sweet-Heart Brownies

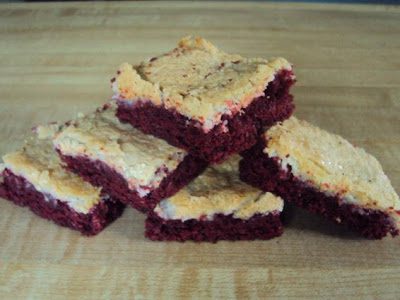
Let’s be honest: Valentine’s Day is really just a great excuse to pair rich chocolate with tangy cheesecake, isn’t it? These Red Velvet Cheesecake Brownies are what I like to call the “power couple” of the dessert world. You get that deep, cocoa-rich red base swirled with creamy cheesecake and it looks absolutely gorgeous on a plate, but I promise it’s much easier to make than it looks.
Whether you’re baking these for a sweetheart or just because you want a treat, these are guaranteed to be a hit. Grab a cup of coffee, and let’s get baking!

The Ultimate Sweet-Heart Brownies
Ingredients
For the Red Velvet Base:
- 1/2 cup melted butter
- 1 cup sugar
- 2 large eggs
- 1 tsp vanilla
- 1 tbsp red food coloring for that classic pop of color!
- 1 tsp vinegar trust me, it reacts with the cocoa for the best flavor
- 1/4 cup unsweetened cocoa powder
- 3/4 cup flour
For the Cheesecake Swirl:
- 8 oz cream cheese softened
- 1/4 cup sugar
- 1 egg
- 1/2 tsp vanilla
Instructions
- Preheat your oven to 350°F and grease an 8-inch square pan (or line it with parchment paper for easy lifting).
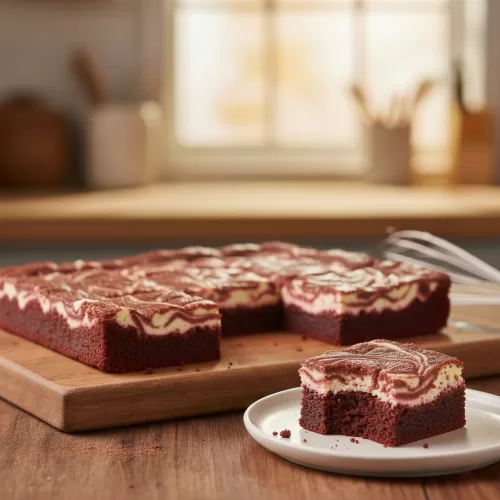
- In a medium bowl, whisk together the melted butter and sugar. Stir in the eggs, vanilla, red food coloring, and vinegar. Sift in the cocoa powder and flour, then gently fold them in until the streaks just disappear. Remember: Set aside 1/4 cup of this batter for later!
- In a separate bowl, beat the softened cream cheese, sugar, egg, and vanilla until it’s smooth and creamy.
- Spread the main red velvet batter into your prepared pan. Pour the cheesecake mixture over the top and spread it out evenly.
- Take that reserved 1/4 cup of red batter and drop small "dots" on top of the cheesecake layer. Use a toothpick or skewer to drag a line through the center of each dot to create your little hearts, or just swirl it around.
- Pop them in the oven for 25–30 minutes. You’ll know they’re done when the edges are set, but the center still has a tiny bit of "wobble" (this keeps them fudgy!).
- Let them cool completely on the counter, then place them into the fridge for 1–2 hours. This is the secret to getting those clean, professional-looking squares!
Notes
A Few Secrets for Success
-
Easy on the Mixing: When you add the flour, just fold it in until it’s just combined. If you over-mix, you’ll lose that lovely fudgy bite we’re after.
-
The “Drop & Drag” Trick: Spread most of your red batter into an 8-inch square pan, but keep about 1/4 cup of it to the side. Pour your cheesecake mix over the top, then “dollop” little dots of that leftover red batter on top.
-
Making the Hearts: This is the fun part! Take a toothpick and drag it right through the center of those red dots. It’ll naturally pull the batter into a heart shape. It’s a “sweet” little touch that always gets compliments.
-
The Hard Part (Waiting): For those perfect, clean squares, let them cool completely and then pop them in the fridge for an hour or two before you slice them. It makes all the difference!
If you want to go the extra mile, try using a heart-shaped cookie cutter to cut out individual brownies.
Happy baking, and I hope your Valentine’s Day is as sweet as these brownies!