Pineapple Cream Cheese Pie
ConAgra Brands and General Mills sponsored this post, but the opinions are my own.

The holidays are among us which means it’s time for parties, hosting family & friends, and making delicious holiday treats! I love the holidays, however it can be overwhelming with all the cooking, decorating, buying gifts, etc. I try to prepare as much as possible, but there are times when I need to whip up something at the last minute. For those kinds of dishes I like to make a semi-homemade recipe that saves me time, and tastes delicious.

Pillsbury™ Refrigerated Pie Crusts are definitely one of my go-to products. They taste like I made the crust, they’re so easy to roll out, and you have a delicious pie crust in a matter of seconds. I make sure I pick up a box or two when I’m at Walmart so I always have them on hand. If you don’t need them right away, you can always toss them into the freezer and just thaw them at a later time. I’ve done it a million times and they always taste delicious, and turn out perfect every time.
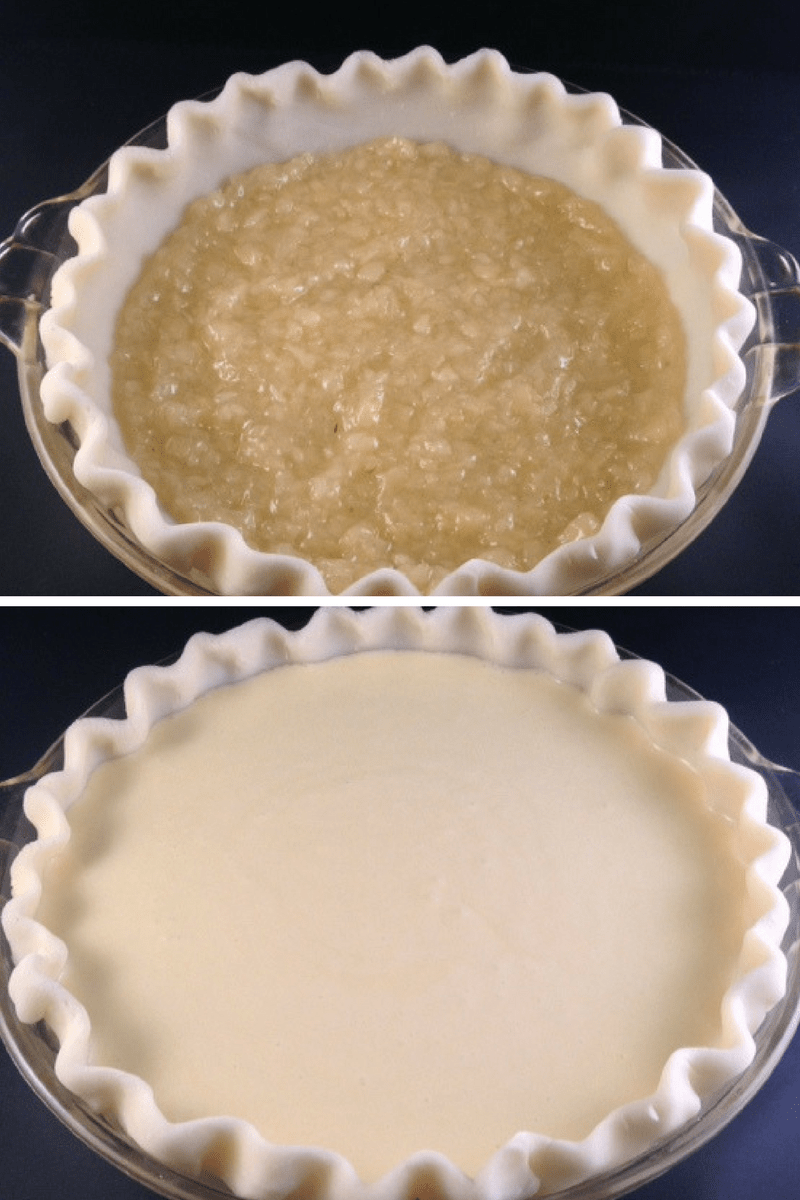
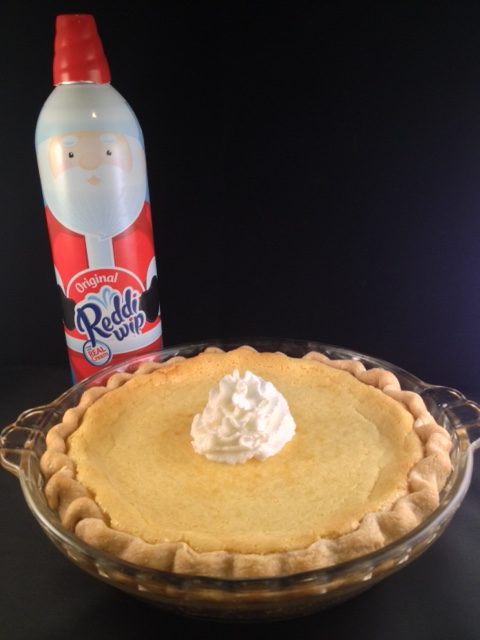
Every year around the holidays, I make a ton of pineapple cream cheese braids for family and friends. It’s a delicious pastry so I decided to take those flavors and turn them into a pie. It turned out divine! On the bottom you have a layer of tart pineapple, then a layer of creamy sweetened cream cheese and it’s topped off with a dollop of Reddi-wip Original Dairy Whipped
Topping. That little dollop of Reddi-wip adds a dash of sweetness that compliments the pie perfectly. I pick up a few cans of this at Walmart too. I not only use it for pies, but also cakes, fruits, and smoothies.
Pineapple Cream Cheese Pie
Ingredients
- 1/4 C sugar
- 1 Tbsp. cornstarch
- 1 8-9 oz. can crushed pineapple
- 8 oz. cream cheese softened
- 1 tsp. vanilla
- 1/2 C sugar
- dash of salt
- 1 egg
- 1/2 C milk
- 1 Pillsbury™ Refrigerated Pie Crust
- 1 can Reddi-wip
Instructions
- Preheat oven to 400 degrees; grease a 9" pie pan.
- Place 1/4 C sugar, cornstarch and pineapple into a saucepan; cook over medium heat until the mixture is thick and clear. Set aside to cool.
- Blend cream cheese, vanilla, 1/2 C sugar and salt until creamy.
- Whip in the egg.
- Stir in the milk and mix until combined.
- Place pie crust into pan and crimp the edges.
- Spread the pineapple mixture over the bottom of the unbaked crust.
- Pour the cream cheese mixture on top.
- Bake for 10 minutes at 400 degrees then reduce heat to 350 degrees and continue baking for 45-50 minutes.
- Allow to cool; add a dollop of Reddi-wip.
- Slice, serve and enjoy!
Right now is the perfect time to stock up on Reddi-wip Original Whipped Topping and Pillsbury™ Refrigerated Pie Crusts so you can #unleashthejoy this holiday season!